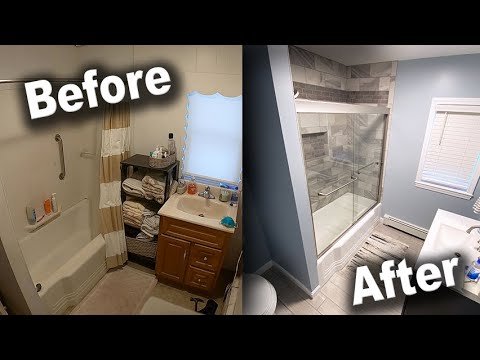
Embarking on a DIY bathroom remodel can be both a thrilling and daunting project. For homeowners looking to upgrade their space without the hefty price tag of professional services, a DIY approach can offer a satisfying path to a beautiful and functional bathroom. This guide walks you through a time-lapse overview of renovating a bathroom from start to finish, offering helpful insights and tips to manage your project efficiently.
**Planning and Design**
The first step in any successful renovation is thorough planning. Begin by assessing your current bathroom’s layout, plumbing, and electrical configurations. Consider what changes are necessary to meet your needs, whether it’s improving lighting, increasing storage, or just updating the look.
Design your new space with precision. Utilize design software or sketch out the layout if you’re comfortable with drawing by hand. During this phase, decide on your style preferences—modern, traditional, minimalist, etc.—and select materials accordingly (tiles, fixtures, mirrors). Remember that functionality should go hand-in-hand with aesthetics.
**Demolition**
With all plans in place and materials purchased, it’s time to start the demolition process. This can be the most cathartic part of any remodel but proceed with caution! Shut off water and power supplies before removing old fixtures and tiles. It’s wise to keep safety gear on hand—gloves, goggles, and masks are must-haves.
Removing old flooring and wall materials usually reveals hidden issues such as mold or outdated plumbing that needs addressing before moving forward. Tackling these problems during the demolition phase prevents future complications.
**Plumbing and Electrical**
Reworking plumbing or electrical setups is typically where DIY renovators might feel out of depth. If you’ve decided not to hire professionals for this step, ensure you have a clear understanding of your home’s plumbing system and adhere strictly to local building codes. Rerouting pipes or wires often requires inspections so coordinating with local authorities is essential.
**Drywall Installation**
Once all behind-the-scenes work is completed and passed inspection (if required), installing drywall begins. This stage transforms your bathroom from a construction zone into something resembling an actual room again.
Properly measure, cut, and install drywall around the new layout—be meticulous as this forms the surface for your chosen wall finishes.
**Tiling**
Tiling can be one of the more challenging tasks in terms of precision labor involved in a bathroom remodel. Start by applying tile backer boards if needed followed by laying tiles meticulously ensuring each aligns correctly for both aesthetic appeal and functionality (consideration for water runoff). Grouting properly seals everything in place.
**Fixtures Installation**
Installing fixtures includes mounting sinks toilets showers or tubs as well as smaller hardware such as towel racks cabinets or light fittings Depending on new designs positions may need adjustments so always measure twice before fixing anything permanently
**Finishing Touches**
The last phase involves painting applying sealants where necessary installing doors trimming where required These are critical steps as they define the look feel quality finish of your newly remodeled bathroom Take time here details matter
**Celebrating Your New Bathroom**
After putting hard work into remodeling take moment appreciate transformed space Before fully enjoying result run thorough check ensure everything operational leaks missing functionalities
Finally remember document process through photos videos Before After shots not only serve remind how far come but are incredibly satisfying share others may inspire undertake own DIY projects Happy renovating

Leave a Reply